How to Install Centos 5.5 Step by Step
How to Install Centos?
CentOS (Community Enterprise Operating System) is a distribution of Linux derived from the Red Hat Enterprise Linux (RHEL) released in March 2004. It is no cost and free to distribute, hence popular among users, web hosts and small businesses. It was initially originated as a build artifact of CAOS Linux. It became the most popular Linux distribution in July 2010, with almost 30% of all servers using it, but Debian overtook it in January 2012. Red Hat announced to sponsor the CentOS in January 2014, due to which the ownership of CentOS trademarks was granted to Red Hat.
A final product similar to RHEL was developed by CentOS developers using Red Hat's source code to aim at the functional compatibility of RHEL.
A team called 'Governing Board' containing Red Hat employees and developers of CentOS was established to develop the distribution further and support the various workgroups.
CentOS is constantly evolving hence provide the platform for the latest software. New developments are done by keeping in mind the stability of already active components. It is very useful and efficient for the virtualization of operating systems.
Versions of CentOS
There are many versions of CentOS released.
| CentOS Version | Release Date |
| 2.1 | 14 May 2004 |
| 3.1 | 19 March 2004 |
| 3.3 | 17 September 2004 |
| 3.4 | 23 January 2005 |
| 3.5 | 10 June 2005 |
| 3.6 | 1 November 2005 |
| 3.7 | 10 April 2006 |
| 3.8 | 25 August 2006 |
| 3.9 | 26 July 2007 |
| 4.0 | 9 March 2005 |
| 4.1 | 12 June 2005 |
| 4.2 | 13 October 2005 |
| 4.3 | 21 March 2006 |
| 4.4 | 30 August 2006 |
| 4.5 | 17 May 2007 |
| 4.6 | 16 December 2007 |
| 4.7 | 13 September 2008 |
| 4.8 | 21 August 2009 |
| 4.9 | 2 March 2011 |
| 5.0 | 12 April 2007 |
| 5.1 | 2 December 2007 |
| 5.2 | 24 June 2008 |
| 5.3 | 31 March 2009 |
| 5.4 | 21 October 2009 |
| 5.5 | 14 May 2010 |
| 5.6 | 8 April 2011 |
| 5.7 | 13 September 2011 |
| 5.8 | 7 March 2012 |
| 5.9 | 17 January 2013 |
| 5.10 | 19 October 2013 |
| 5.11 | 30 September 2014 |
| 6.0 | 10 July 2011 |
| 6.1 | 9 December 2011 |
| 6.2 | 20 December 2011 |
| 6.3 | 9 July 2012 |
| 6.4 | 9 March 203 |
| 6.5 | 1 December 2013 |
| 6.6 | 28 October 2014 |
| 6.7 | 7 August 2015 |
| 6.8 | 25 May 2016 |
| 6.9 | 5 April 2017 |
| 6.10 | 3 July 2018 |
| 7.0-1406 | 7 July 2014 |
| 7.1-1503 | 31 March 2015 |
| 7.2-1511 | 14 December 2015 |
| 7.3-1611 | 12 December 2016 |
| 7.4-1708 | 13 September 2017 |
| 7.5-1804 | 10 May 2018 |
| 7.6-1810 | 3 December 2018 |
Version 3 was supported for 6 years, 4 was supported for 7 years, while 5, 6 and 7 will be maintained for 10 years.
Different architectures support in different versions like i386 systems is supported in versions 4, 5, 6 and 7. Architecture ia64, ppc, SPARC, Alpha and s390 are supported only in version 4. Armhfp and aarch64 are supported in version 7 of CentOS.
Steps to Install Centos 7
Now let us see how to install CentOS 7 using the below steps.
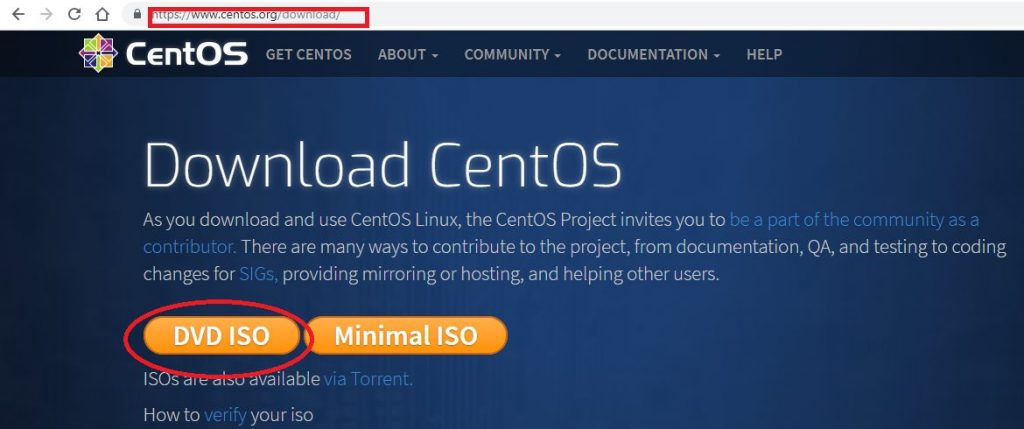
Step 1: Download the ISO image
A copy of CentOS must be downloaded from the link given below: https://www.centos.org/download/.
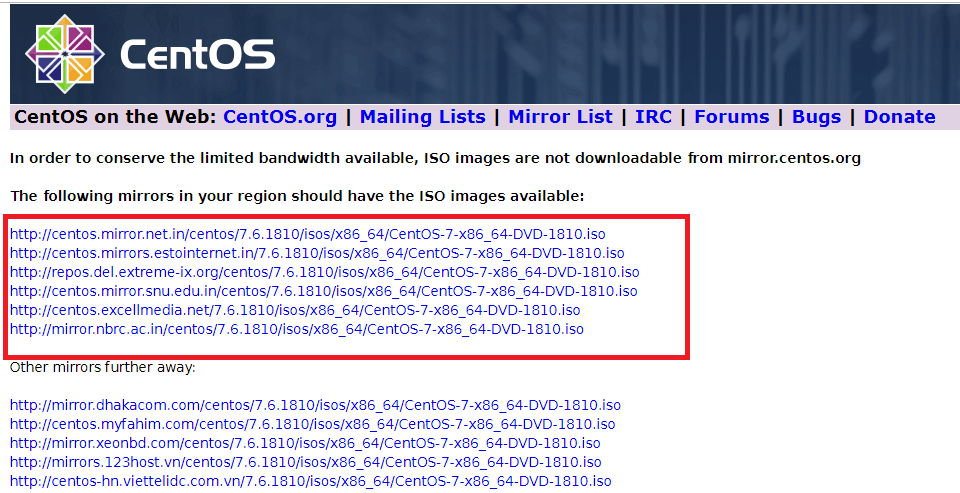
Step 2: Select the ISO image
Select which image is suitable for your system or according to your need.
Step 3: Make a Bootable Drive
Simply transfer the iso file to USB using the dd command, or you can use Win32DiskImager or Etcher.
# dd if=/iso/CentOS-7-x86_64-DVD-1602-99.iso of=/dev/sdb
Ensure that you have at least 4.3 GB of free space in your USB.
Step 4: Begin to Install Centos
Place the created USB into the appropriate drive, start your computer, select the bootable unit and a window shown below will appear.
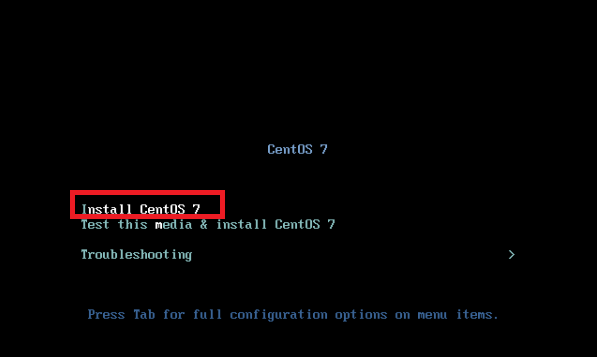
Select "Install CentOS 7" and press Enter Key.
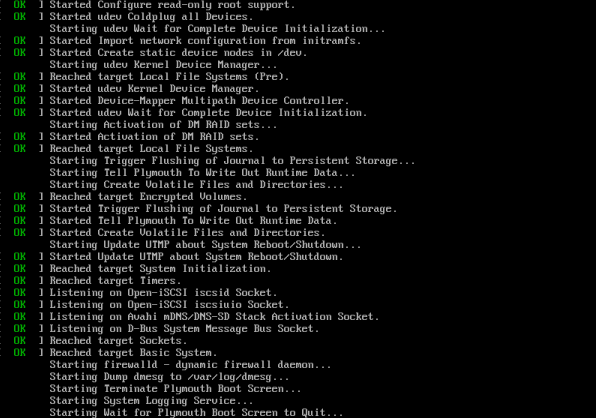
The system would start loading the media installer.
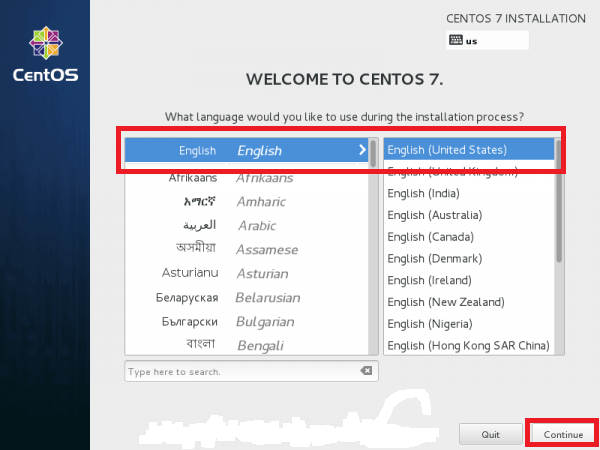
Step 5: Select the desired language
Select the language appropriately to use during installation and press Continue.
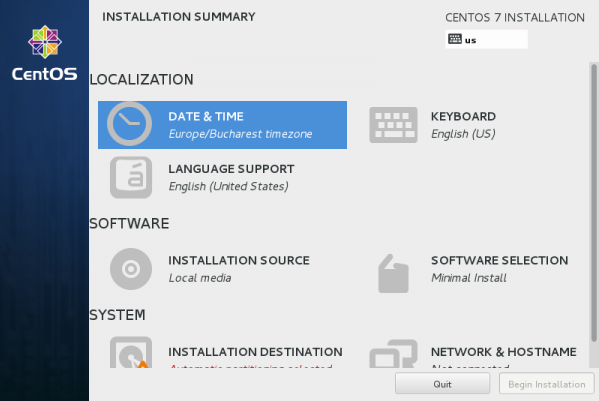
Step 6: Customize your system.
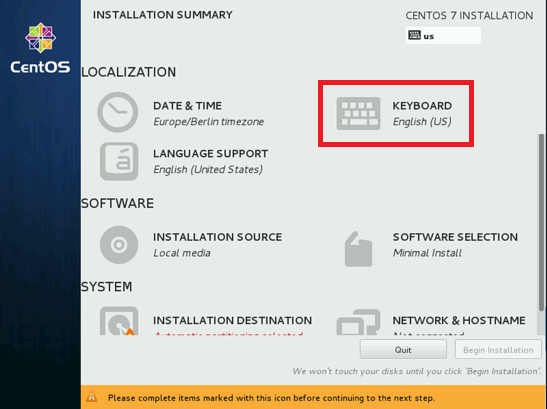
The installation summary window will appear with lots of options present. Change settings one by one according to your needs.

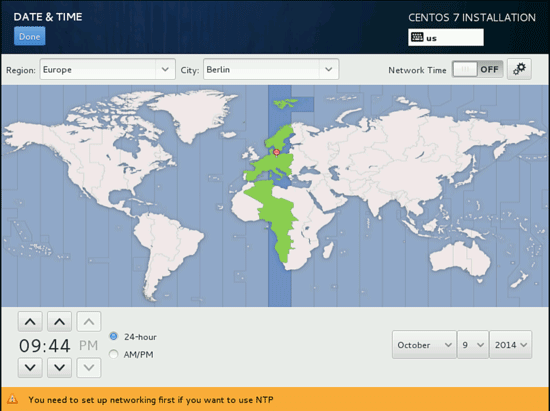
Click on DATE & TIME and change the place in the map and click on Done.
A map will appear, and select your time zone.
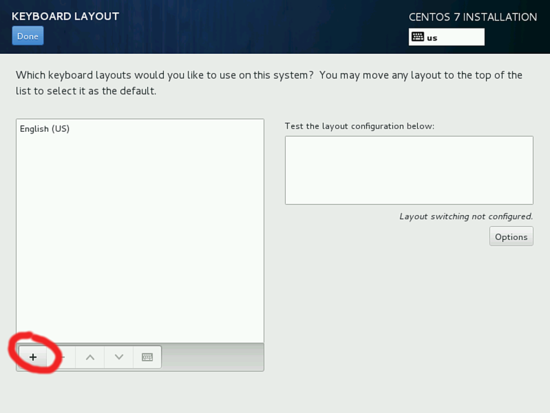
Now change the Keyboard settings by clicking the KEYBOARD.
A window will appear. Choose a language and click on the + icon to add more keyboard layout.
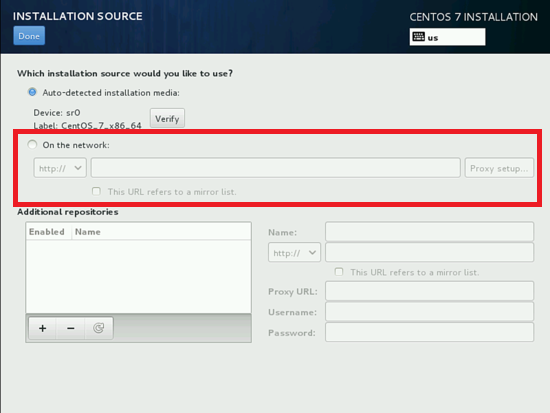
Installation Source will be Auto-detected installation media. If you have any other source of installation, then you can put the path accordingly.
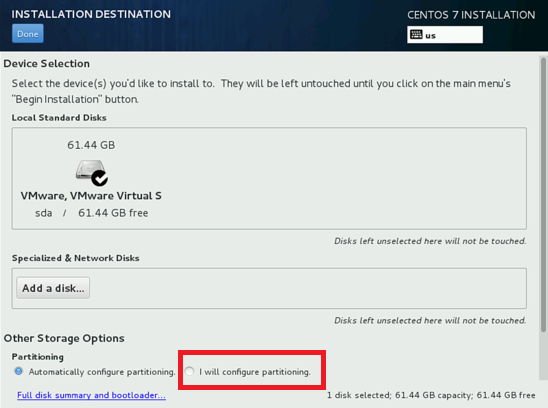
Now change the "Installation Destination", and you can also do manual partitioning. For manual portioning, click on "I will configure partitioning".
Now you can customize NETWORK & HOSTNAME settings.
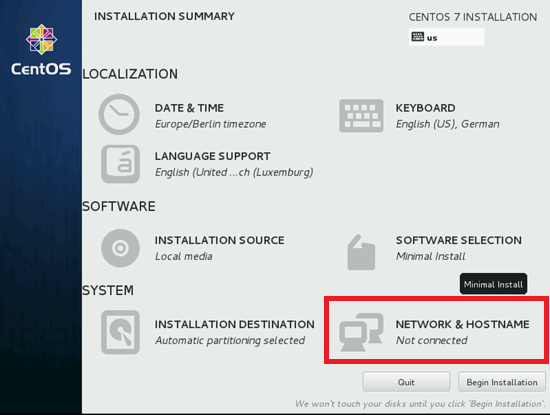
Add the hostname and then click on Configure to customize the Ethernet part.
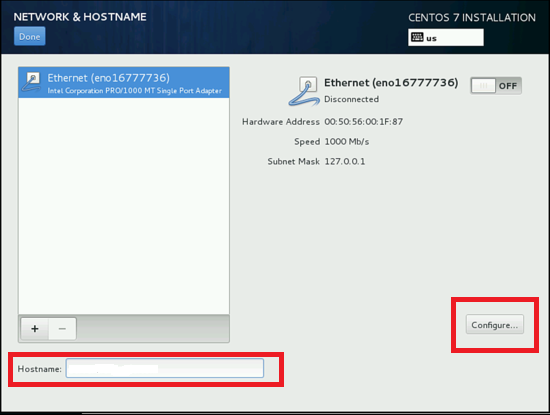
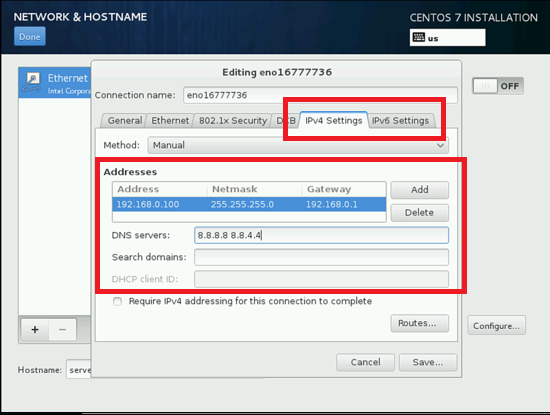
Now the window will appear. You can add IPv4 and IPv6 settings as required.
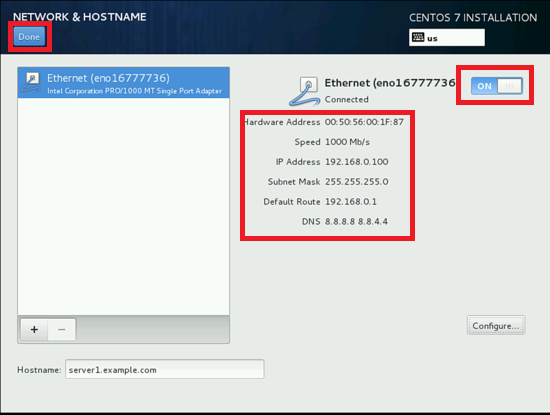
Now make the connection ON. All the details of the connection would be shown.
After it clicks on Done.
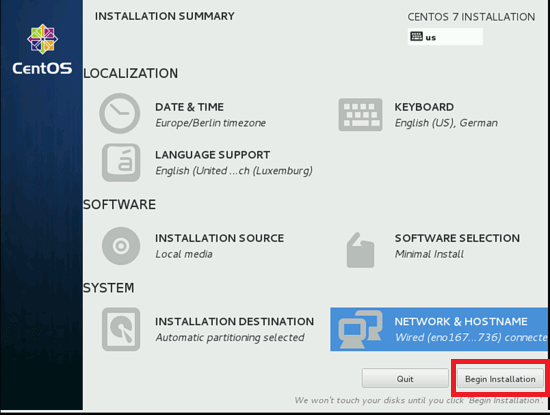
Now we can begin to install Centos by clicking on the "Begin Installation" button.
The process to install Centos will start. Now we need to provide USER SETTINGS.

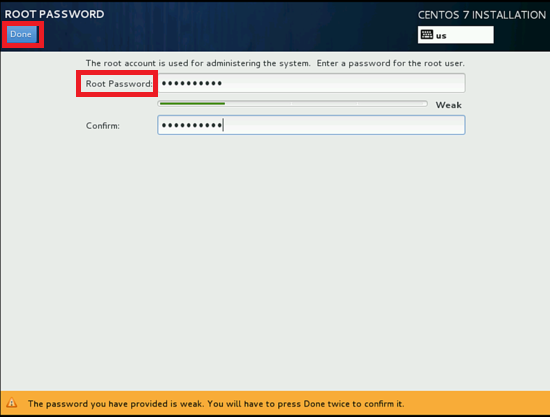
First, let us set the root password. Click on ROOT PASSWORD. A window will appear. Set the root password of your choice and click Done.
Now we will create a user.
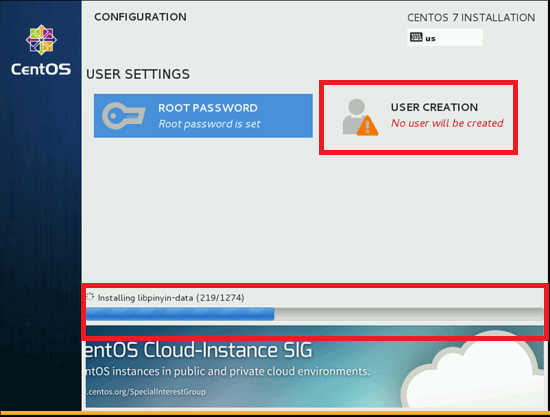
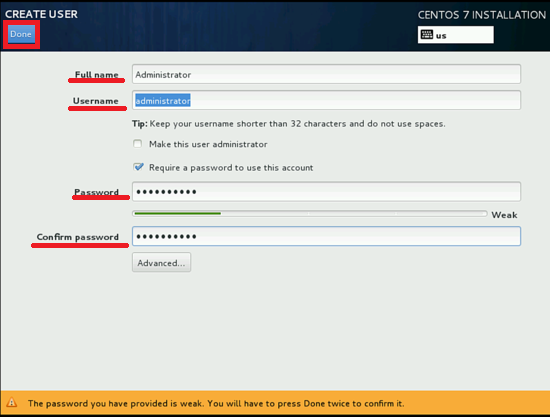
Click on "USER CREATION" and create a USER by filling in the required details and then press Done.
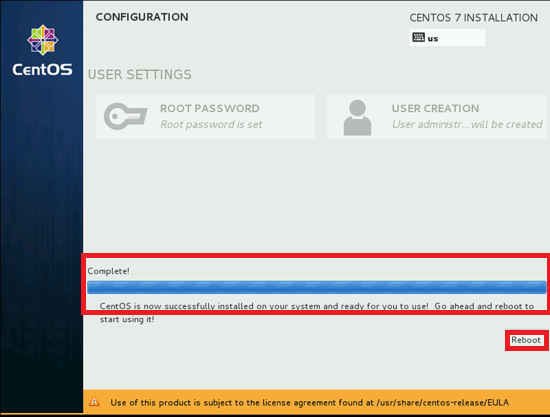
Now, wait for some time. After completion of your installation, it will ask for Rebooting your system, so click the Reboot button.
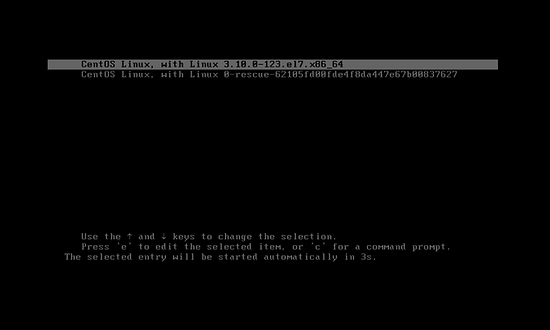
After rebooting, your login screen will open.
Enter your user login details.
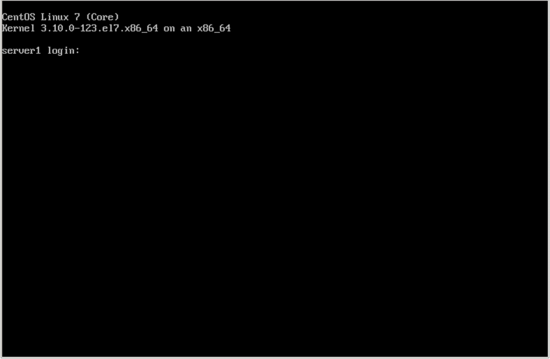
Now your CentOS 7 has been successfully installed on your system. Now install requires software to do your other tasks and start using your CentOS distribution of Linux.
Recommended Articles
This has been a guide on How to Install CentOS. Here we have different steps of installing CentOS in an easier and simplest manner with different versions of CentOS. You may also look at the following articles to learn more –
- Install Java 8
- Install Cassandra
- Install .NET
- Install Bootstrap
How to Install Centos 5.5 Step by Step
Source: https://www.educba.com/install-centos/
0 Response to "How to Install Centos 5.5 Step by Step"
Post a Comment